reading-notes
Code Fellows reading notes
JavaScript
What is JavaScript
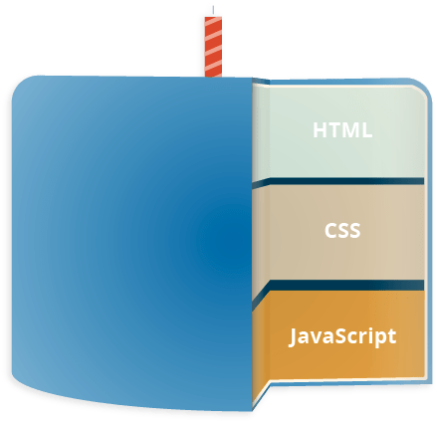
JavaScript (JS) is a lightweight, interpreted, scripting programming language that runs on the client of the web, which can be used to design how web pages behave on the occurence of an event. It allows you to display timely content updates, interactive maps, animated 2D/3D graphics, scrolling video, and more. It is the third layer of programming languages used in in developing a dynamic web page.
Example of JavaScript using simple text label:
HTML: The markup

css: The styling
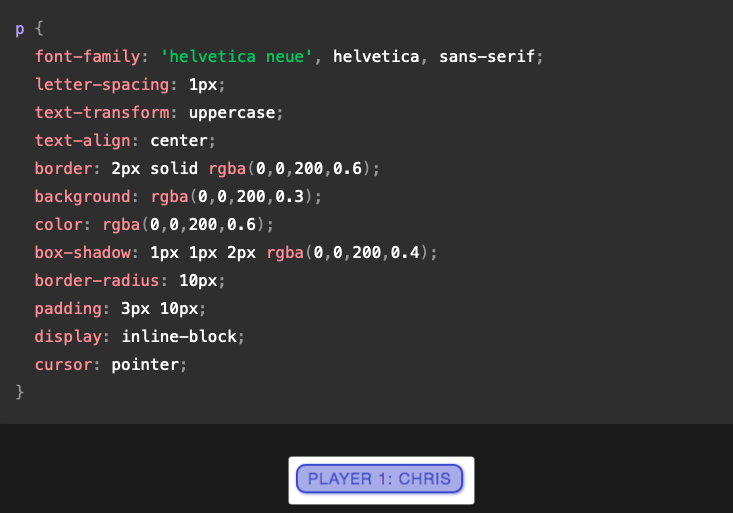
JavaScript: The dynamics
What Can It Do?
The client-side JavaScript language consists of some common programming features that allow you to do things like:
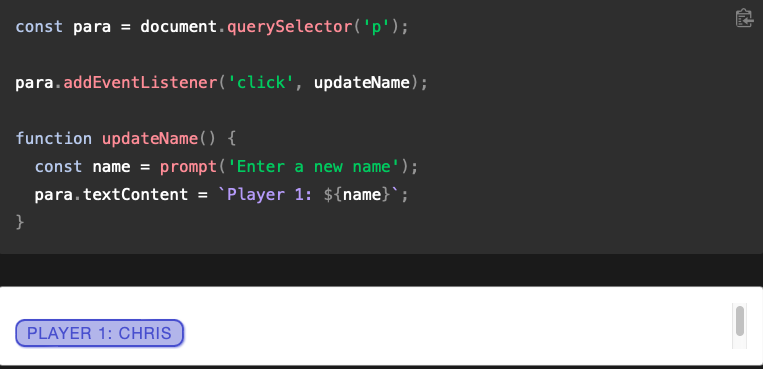
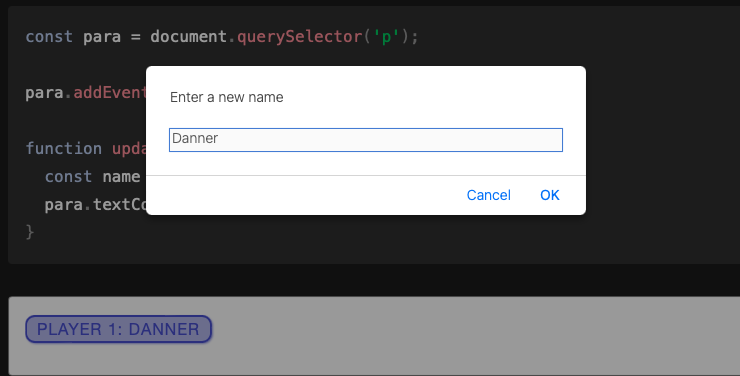
- Store useful values inside variables. In the above example for instance, we ask for a new name to be entered then store that name in a variable called name.
- Operations on pieces of text (known as “strings” in programming). In the above example we take the string “Player 1: “ and join it to the name variable to create the complete text label, e.g. “Player 1: Chris”.
- Running code in response to certain events occurring on a web page. We used a click event in our example above to detect when the label is clicked and then run the code that updates the text label. And more.
What is even more exciting however is the functionality built on top of the client-side JavaScript language. So-called Application Programming Interfaces (APIs) provide you with extra superpowers to use in your JavaScript code.
They generally fall into two categories:
- Browser APIs are built into your web browser, and are able to expose data from the surrounding computer environment, or do useful complex things.
- Third party APIs are not built into the browser by default, and you generally have to grab their code and information from somewhere on the Web.
JavaScript Running Order
When the browser encounters a block of JavaScript, it generally runs it in order, from top to bottom (Interpreted). This means that you need to be careful what order you put things in. For example, the block of JavaScript in the first example:
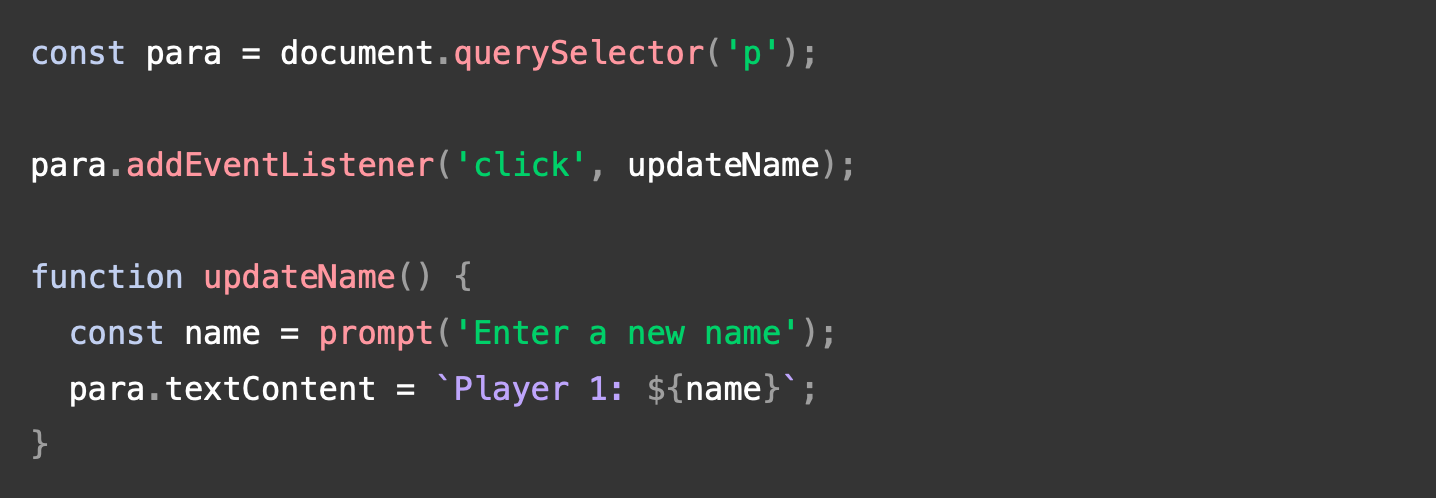
Here we are selecting a text paragraph (line 1), then attaching an event listener to it (line 3) so that when the paragraph is clicked, the updateName() code block (lines 5–8) is run. The updateName() code block (these types of reusable code blocks are called “functions”) asks the user for a new name, and then inserts that name into the paragraph to update the display.
If you swapped the order of the first two lines of code, it would no longer work — instead, you’d get an error returned in the browser developer console — TypeError: para is undefined. This means that the para object does not exist yet, so we can’t add an event listener to it.
How to Add JavaScript to Your page
JavaScript is applied to your HTML page in a similar manner to CSS. Whereas CSS uses <link>elements to apply external stylesheets and <style> elements to apply internal stylesheets to HTML, JavaScript only needs one friend in the world of HTML — the <script> element. Let’s learn how this works.
Internal JavaScript
To internally add JS to your page, go to your HTML file, add a <script> tag in the head of the file.

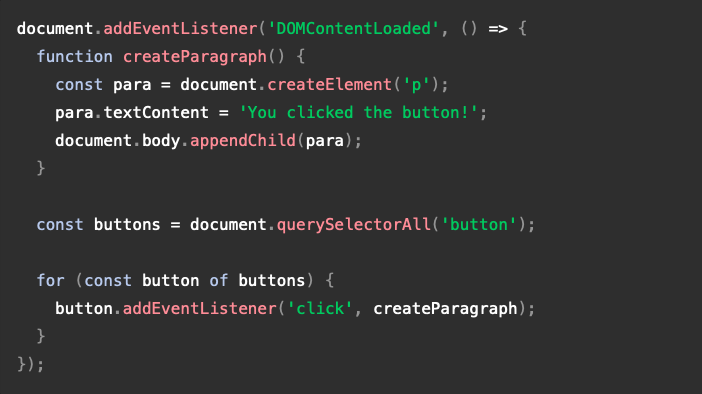
Then add some JavaScript inside the <script> element to make the page do something more interesting.
External JavaScript
- First, create a new file in the same directory as your sample HTML file. Call it
script.js— make sure it has that .js filename extension, as that’s how it is recognized as JavaScript. - Replace your current
<script>element with the following:

Inside script.js, add the following script:
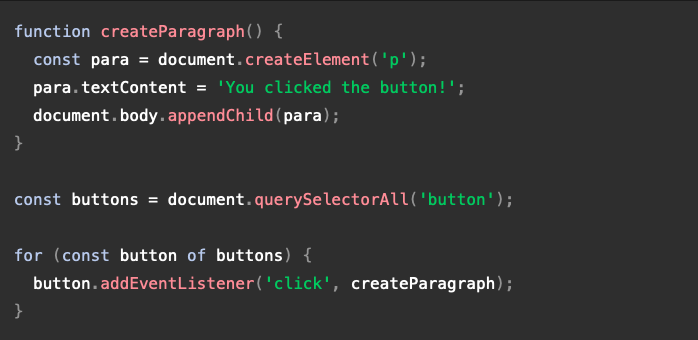
This is generally a good thing in terms of organizing your code and making it reusable across multiple HTML files. Plus, the HTML is easier to read without huge chunks of script dumped in it.
Script Loading Strategies
There are a number of issues involved with getting scripts to load at the right time. Nothing is as simple as it seems! A common problem is that all the HTML on a page is loaded in the order in which it appears. If you are using JavaScript to manipulate elements on the page (or more accurately, the Document Object Model), your code won’t work if the JavaScript is loaded and parsed before the HTML you are trying to do something to.
In the above code examples, in the internal and external examples the JavaScript is loaded and run in the head of the document, before the HTML body is parsed. This could cause an error, so we’ve used some constructs to get around it.
Internal Example Solution

This is an event listener, which listens for the browser’s DOMContentLoaded event, which signifies that the HTML body is completely loaded and parsed. The JavaScript inside this block will not run until after that event is fired, therefore the error is avoided (you’ll learn about events later in the course).
External Example Solution
In the external example, we use a more modern JavaScript feature to solve the problem, the defer attribute, which tells the browser to continue downloading the HTML content once the <script> tag element has been reached.

In this case both the script and the HTML will load simultaneously and the code will work.